🖥️ Lecture slides — Session 02 (Fri Oct 2)
Version Control
Version control is a system that organizes and tracks the versions of code.
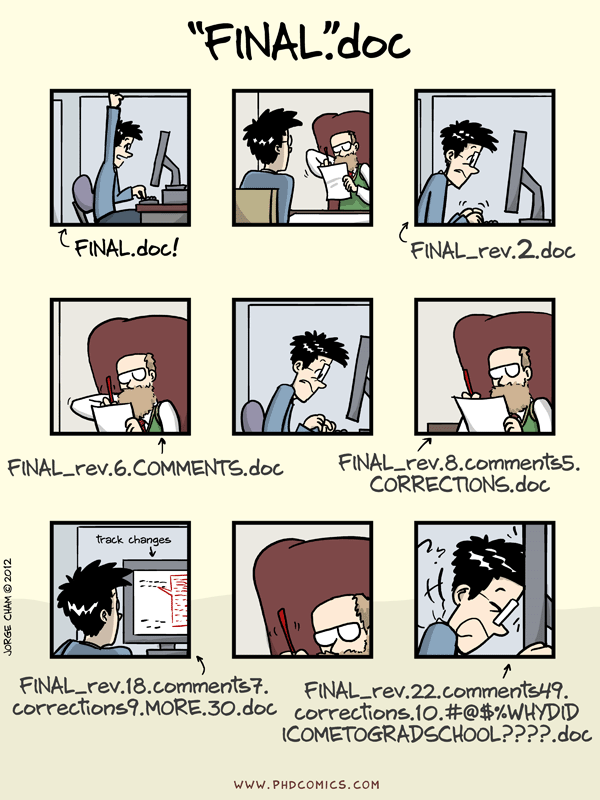
Versions of a research paper. File naming and tracked changes can become messy. From PhD Comics.
It keeps track of the changes and who made them. See further discussion on The Turing Way Community, 2025. Here are the main points.
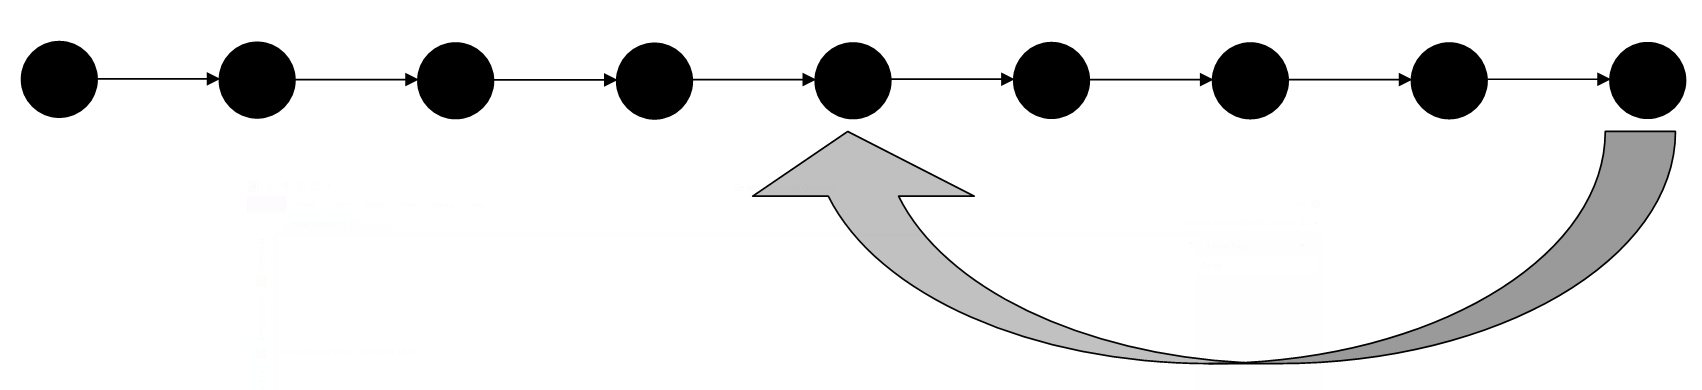
Figure 2:An illustration of a main branch from The Turing Way [1].
At each commit, git records the changes. Several people can work on the same file; version control recognizes conflicts and provides options to resolve them. Good practice keeps the main branch the cleanest branch. Create additional branches to work on specific parts of the project.
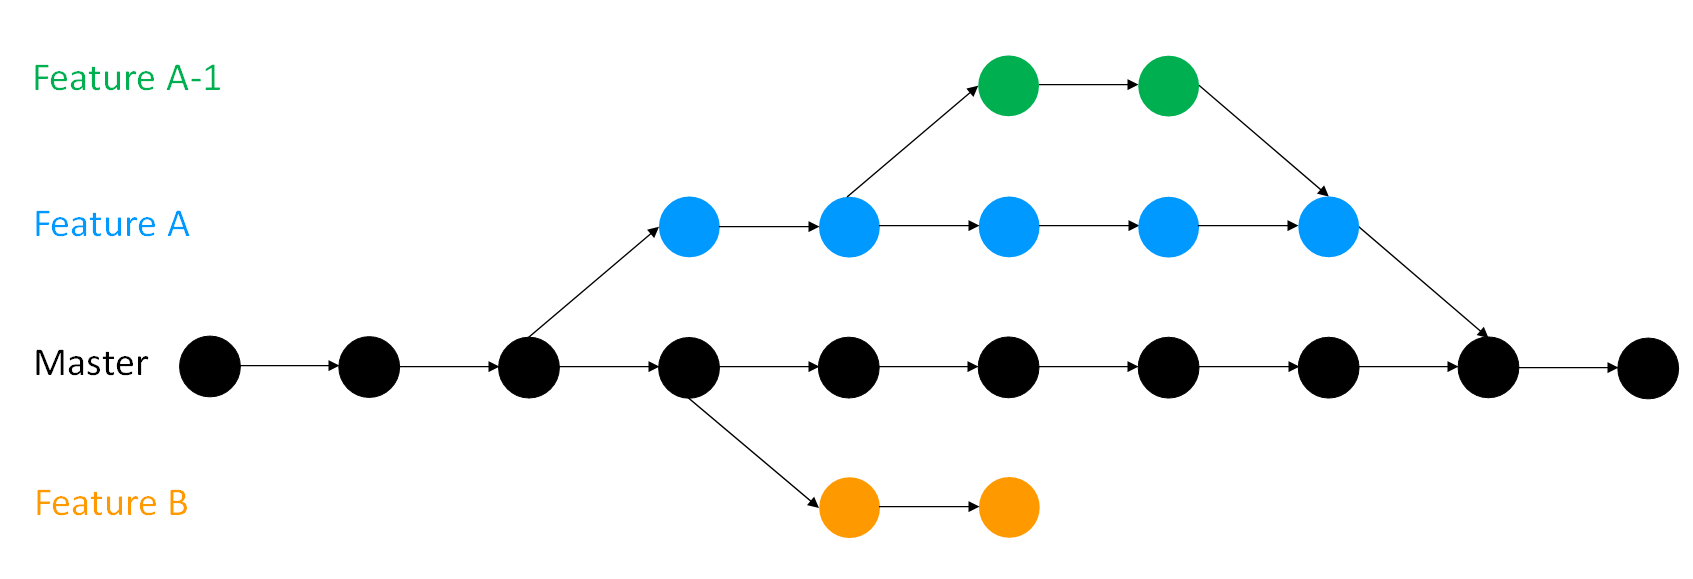
Figure 3:An illustration of multiple sub branches that get created, committed, and merged to the main branch. From The Turing Way [1].
What is the difference between git and GitHub?
- git is a software: you can use it to track changes on your computer, with no network involved.
- GitHub is a platform that hosts repositories and adds collaboration tools (pull requests, issues, actions). Other platforms exist, such as Bitbucket and GitLab.
Set up Git
Set your user name and e-mail:
git config --global user.name "superseismo"
git config --global user.email "superseismo@uw.edu"
Use the same user name as your GitHub account, so GitHub attributes your commits to you. You only need to do this once per computer.
GitHub
Create a GitHub account
Create a GitHub account using the same user name and email address as in your git config. Free accounts include unlimited public and private repositories; paid plans add organization and enterprise features you will not need in this course.
Authentication
GitHub requires two-factor authentication (2FA) for all contributors — set it up when you create the account, with an authenticator app, a passkey, or the GitHub Mobile app. Your account password alone never authenticates git operations; use one of the following:
- The gh CLI (recommended). Install GitHub CLI and run
gh auth login. It walks you through a browser login and configures git credentials for you.ghalso creates repositories (gh repo create), opens pull requests (gh pr create), and manages issues from the terminal. - Fine-grained personal access tokens. When a tool needs a token (a CI job, a remote JupyterHub), create a fine-grained token scoped to only the repositories and permissions it needs, with an expiration date. The token replaces the password in HTTPS operations. Avoid classic tokens, which grant broad access. Store tokens outside cloud-synced folders (not Dropbox or Google Drive).
- SSH keys. Generate a key pair and add the public key to your GitHub account; see an example setup here. Convenient on machines you use often, including remote servers.
More details on GitHub authentication here. The git cheat sheet is a handy command reference.
Get a copy of an existing repository
There are two ways to work from an existing repository, and they are not the same:
A clone is a local copy of a repository on your computer. Cloning records the original as a remote named
origin, but the copy does not stay synchronized on its own: nothing moves between your computer and GitHub until you run a command. Rungit fetchto download new history from the remote (without touching your files),git pullto fetch and merge it into your current branch, andgit pushto send your commits up.git clone https://github.com/superseismo/example.git cd example git pull # each time you resume work: bring in what changed on GitHubA fork (button at the top right of a repository page on GitHub) is a copy of the repository under your own GitHub account. You fork when you want to propose changes to a repository you cannot write to: you push to your fork, then open a pull request back to the original. A fork also does not track the original automatically; GitHub offers a “Sync fork” button, or you add the original as a second remote and pull from it.
Rule of thumb: clone repositories you own or have write access to (your MLGEO2026_UWNETID repository, your team’s project); fork, then clone your fork for repositories you do not have write access to (this book, most open source projects).
Create a new repository
You are going to create your first repository. Do it once, with one of the following three methods.
From the browser:
- Log in to GitHub. In the upper-right corner of any page, click
+, then New repository. - Name it, choose public or private.
- Check Add a README file and choose a license.
- Click Create repository.
- Clone it to your computer:
git clone https://github.com/superseismo/my-repo.git
From the gh CLI (one command does all of the above):
gh repo create my-repo --public --add-readme --license mit --cloneFrom git alone, when the code already exists in a local directory: create an empty repository on GitHub first (browser method, steps 1–4, without the README), then
cd my-project
git init
git add .
git commit -m "first commit"
git remote add origin https://github.com/superseismo/my-project.git
git push -u origin main
Choose a local path outside cloud-synced folders (Dropbox, Google Drive) to reduce headaches, then open the repository in VS Code or your preferred editor. What belongs in a repository — README, license, CONTRIBUTING file, environment specification — is covered in 1.1 Open Reproducible Science; best practices follow Nenadic et al. (2022). Add a .gitignore file early to keep large data files and generated outputs from ever being committed.
The everyday cycle
Day to day, contributing to a repository is a loop of four commands:
Update your local copy before you start:
git pullEdit files in your editor, then check what changed:
git status
git diff
Stage and commit the changes with a descriptive message:
git add <file1> <file2>       # or: git add .  for all modified files
git commit -m "Your descriptive commit message"
GitHub uses staging as the terminology for collecting the changes that the next commit will record on the remote server.
Push the commits to GitHub:
git push
Example workflow
A complete pass through the loop, ending in a pull request:
Update and branch. Start from the current main branch and create a working branch:
git pull
git switch -c fix-readme
Edit. Open
example.txt, make your changes, and review them withgit diff.Stage and commit:
git add example.txt
git commit -m "Clarify installation instructions"
Push the branch to GitHub:
git push -u origin fix-readmeOpen a pull request. Either click the link git prints after the push, use the Compare & pull request button on the repository page, or run:
gh pr createOnce the pull request is reviewed and merged, switch back to main and pull the merged result:
git switch main, thengit pull.
Undo changes
Modern git separates “undo” into explicit commands. Two safe, everyday ones:
Unstage a file you added by mistake (your edits are kept):
git restore --staged newfile.pySee where you stand at any point:
git status
To throw away your local edits to a file and return to the last committed version:
git restore mycode.pyYou may see git checkout and git reset HEAD <file> in older tutorials; git restore (for files) and git switch (for branches) replaced them in 2019 because checkout did both jobs at once and made mistakes easy.
Work as a team
The main branch should remain the clean, official version for the public.
- Use pull requests to propose code changes to a repository. The pull request tracks line-by-line changes and lets contributors review before anything reaches main. The workflow:
- Fork the repository (skip this if you have write access — branch instead).
- Clone the fork to your computer.
- Create a branch, make your changes, then add + commit + push.
- Open the pull request from the browser or with
gh pr create. Mention specific colleagues with@their-github-nameto notify them. - Reviewers read the
diffbetween the two versions. - The repository owners accept, or request changes before accepting.
- Once merged, your changes are part of the main repository.
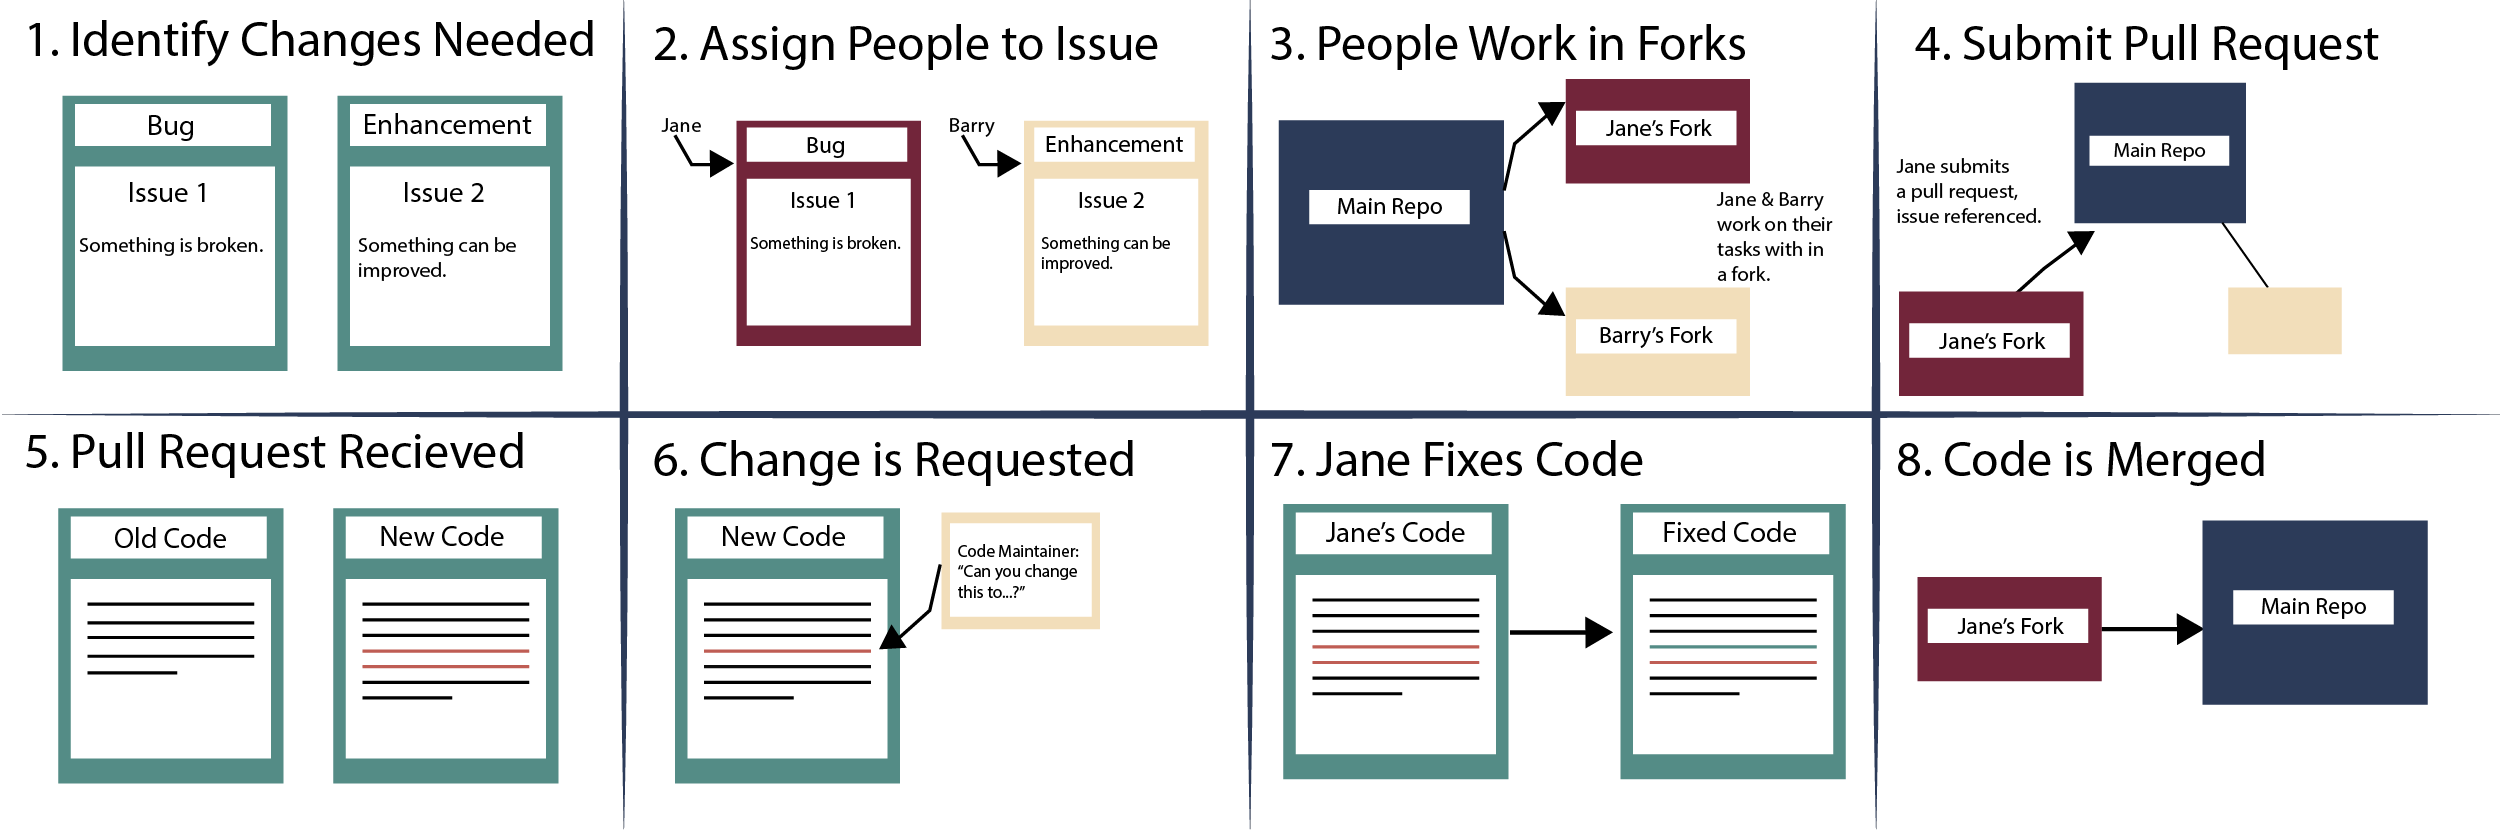
Pull requests using GitHub: Found in EarthDataScience. Source: Earth Lab, Alana Faller
- Use GitHub Issues to report bugs or performance problems, so contributors can track and address them. There are templates for posting issues, and online discussions about them. The main takeaways:
- Avoid duplication; check whether somebody else has reported the same issue.
- Use the template.
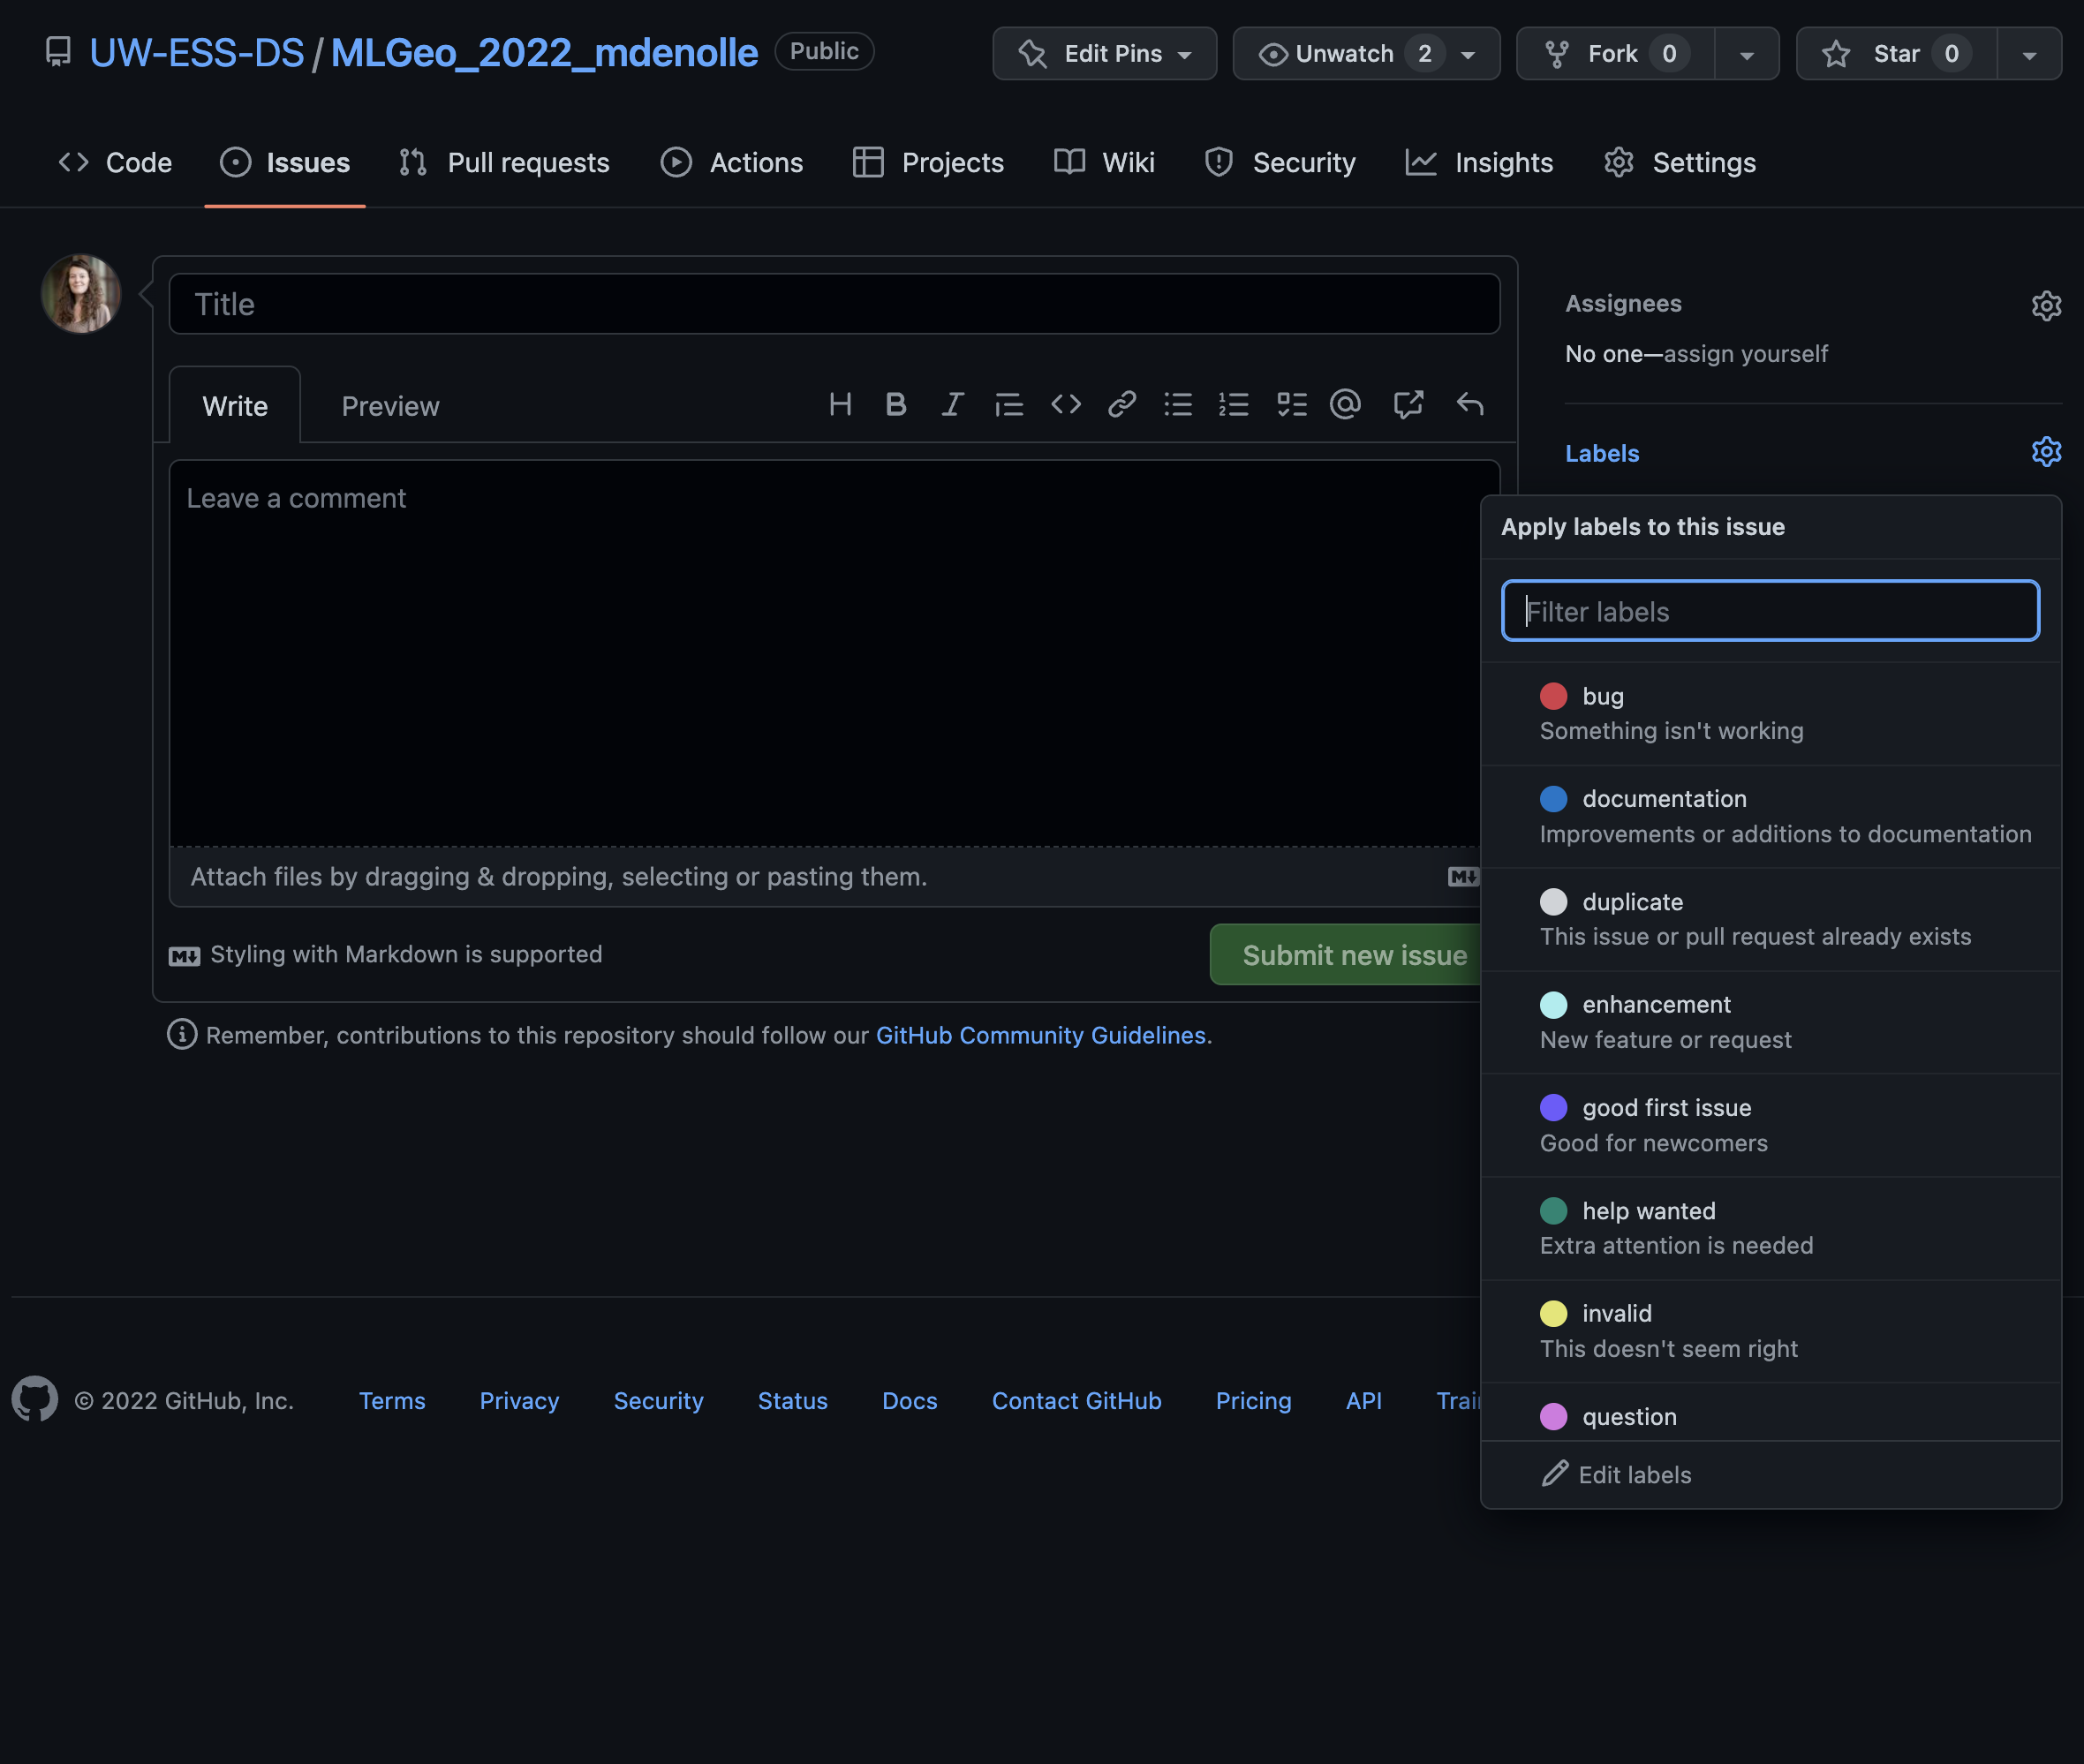
GitHub Issues: Use template
Further discussion here.
Recommended Repository Structure
Repository Structure
your-repo/
├── .github/ # GitHub-specific files (e.g., issue templates, workflows)
│ ├── ISSUE_TEMPLATE/ # for sophisticated community package
│ ├── PULL_REQUEST_TEMPLATE.md  # for sophisticated community package
│ └── workflows/
│ └── ci.yml # Continuous Integration configuration, publish package, build container, test, build github-pages
├── docs/ # Documentation files
│ ├── conf.py # Sphinx configuration file
│ ├── index.rst # Main documentation file
│ └── ...
├── your_package/ # Main package directory
│ ├── init.py # Package initialization
│ ├── module1.py # Example module
│ ├── module2.py # Example module
│ └── ...
├── tests/ # Unit tests
│ ├── init.py
│ ├── test_module1.py # Tests for module1
│ ├── test_module2.py # Tests for module2
│ └── ...
├── .gitignore # Git ignore file
├── environment.yml # Conda environment file
├── requirements.txt # Pip requirements file
├── pyproject.toml # project TOML file for packaging
├── README.md # Project README file
├── LICENSE # License file
└── CONTRIBUTING.md # Contribution guidelinesExplanation of Key Files and Directories
- [
.github/]: Contains GitHub-specific files, such as issue and pull request templates, and GitHub Actions workflows for CI/CD. docs/: Contains documentation files. Using Sphinx for documentation is a common practice.your_package/: The main package directory where your Python modules and packages reside.tests/: Contains unit tests for your package. Using a testing framework likepytestis recommended..gitignore: Specifies files and directories that git should ignore — use it to keep large data files, credentials, and generated outputs off the remote server.environment.yml: Defines the conda environment for the project.requirements.txt: Lists the pip dependencies for the project.setup.pyorpyproject.toml: Python packages have standards for packaging projects.setup.pyis the traditional way of defining a python package. Because of the newer standard, we only detailpyproject.tomlbelow. You may find other examples ofsetup.pyprojects online.README.md: The main README file that provides an overview of the project.LICENSE: The license file for the project. See 1.1 for choosing software and data licenses.CONTRIBUTING.md: Guidelines for contributing to the project; see 1.1.
Example pyproject.toml
This is a newer standard introduced by PEP 518 and PEP 621. It aims to provide a unified way to specify build system requirements and package metadata. It is part of the effort to modernize Python packaging. Here’s an example pyproject.toml file for packaging your project:
[build-system]
requires = ["setuptools>=42", "wheel"]
build-backend = "setuptools.build_meta"

[project]
name = "your_package"
version = "0.1.0"
description = "A brief description of your project"
readme = "README.md"
requires-python = ">=3.11"
license = {text = "MIT"}
authors = [
    {name = "Your Name", email = "your.email@example.com"}
]
dependencies = [
    "numpy",
    "pandas",
]

[project.urls]
Homepage = "https://github.com/yourusername/your-repo"

[tool.setuptools]
packages = ["your_package"]

[project.scripts]
your_command = "your_package.module:function"
This structure keeps a Python project organized and predictable for collaborators. GitHub itself does not directly use the pyproject.toml file. Instead, you can set up GitHub Actions to automate tasks such as testing, building, and publishing your package.
AI-generated commits and code review
By 2026, much of the code that lands in a student repository was first drafted by an AI assistant, sometimes as a whole commit or pull request opened by the agent itself. Version control is where you stay in charge of that. Three rules for this course:
- Review every AI diff before committing.
git diff(or the staged-changes view in VS Code) exists precisely so nothing enters the history unread. If an agent proposes a multi-file change, read all of it; do not commit code you cannot explain. - Disclose substantial AI assistance in the commit message. A line such as
Co-authored with Claude Codeorinitial draft by Copilot, reviewed and tested by meis enough. Small completions do not need disclosure; a generated function, module, or notebook does. This mirrors the course-wide policy in 1.8. - Make the pull request the control point in team work. Protect the main branch (Settings -> Branches -> branch protection) so changes arrive by pull request, and require at least one human review. An AI can open a PR; only a person merges one. Reviewing a teammate’s AI-assisted PR means checking what the code does, not whether the AI “usually gets it right”.
Publish your software
If the software will be used for future research and would be cited by the community, publish it on Zenodo to get a DOI. See 1.1 Open Reproducible Science for the workflow, licensing, and citation practices.
Exercise — dry run: your first pull request
Pull requests carry real weight in this course: the class leaderboard in 3.5 Multiclass Classification scores prediction files that you submit by PR. This exercise is ungraded, so your first real PR is not your first scored one. It runs entirely against your own MLGEO2026_UWNETID repository (created in 1.9), where a mistake costs nothing.
Clone your repository (if you have not already) and create a branch:
git clone https://github.com/superseismo/MLGEO2026_UWNETID.git
cd MLGEO2026_UWNETID
git switch -c hello-world
Add a line to
README.md— for example, one sentence about what you want out of this course. Check the change withgit diff.Commit and push the branch:
git add README.md
git commit -m "Add hello-world line to README"
git push -u origin hello-world
Open the pull request on GitHub (or
gh pr create). Write one sentence in the description saying what the change is.Review your own diff in the Files changed tab — the same view a reviewer of your leaderboard submission will see. Then merge the PR.
Back on your computer, sync main and delete the merged branch:
git switch main
git pull
git branch -d hello-world
Success looks like: your README edit visible on the main branch on GitHub, a merged PR in the repository’s Pull requests tab, and a local main branch that matches the remote.
Additional Resources
The Turing Way has excellent resources for version control.
- Community, T. T. W. (2025). The Turing Way: A handbook for reproducible, ethical and collaborative research (1.2.3). Zenodo. 10.5281/zenodo.15213042
- Nenadic, A., Crouch, S., Graham, J., Mangham, S., Laird, J., & Robinson, M. (2022). carpentries-incubator/python-intermediate-development: beta (beta). 10.5281/zenodo.6532057